Setup broadcasting in Virtual DJ
This tutorial describes how to setup broadcasting in Virtual DJ. Sign up for a FREE account first, to create your personal broadcast slot. Then, proceed to the first step to connect Virtual DJ and start broadcasting.
Step 1 - Configure broadcasting in Virtual DJ
After you've signed up for a Livesets account, login to Livesets with your new account. When you've logged in, the 'Broadcast setup wizard' is displayed. In the first step of the wizard, click on the 'Configure other software' button to see your broadcast settings. Follow the next steps to add the settings to Virtual Dj:
- Open Virtual DJ and click on the "Record tab" underneath your decks.
- Click on "Broadcast" in the left menu.
- Then click on "Config" in the main section.
- A new window will now open.
- Select 'OGG (Icecast/Icecast2)' as format and 128Kbs for 'Bitrate'.
- Select 'Broadcast to a radio server'
- In the section 'Server', enter 'djuplink.com/' followed by your "Mount path" (for example: 'djuplink.com/DjName.ogg').
- In the section 'Name', enter 'source'.
- In the section 'Password', copy and paste your Livesets password.
- In the section 'Genre', enter the Genres that you (optional).
When you have entered all settings in Virtual DJ, it should like like this:
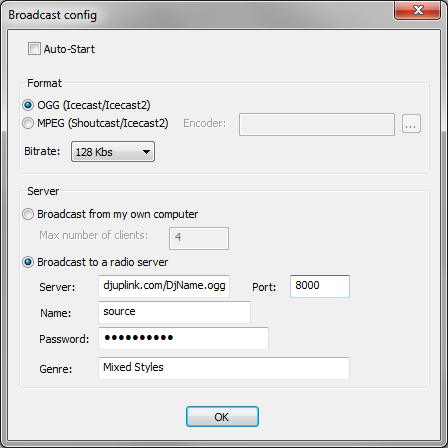
Now that you've entered all your settings to Virtual DJ, click on 'Ok' to close the 'Broadcast config' window.
In the Beatbravo setup wizard, click on the 'Connection test' button and proceed to the next step.
Step 2 - Start broadcasting from Virtual DJ
You are now ready to test your broadcast settings in Virtual DJ.
(When your connection fails, check your broadcast setting and repeat the steps on this page.)
In the Beatbravo setup wizard, click on the 'Connection test' button and proceed to the next step.
Step 2 - Start broadcasting from Virtual DJ
You are now ready to test your broadcast settings in Virtual DJ.
- Load a track in Virtual DJ and start playing it.
- Open Virtual DJ and click on the "Record tab" underneath your decks.
- Click on "Broadcast" in the left menu.
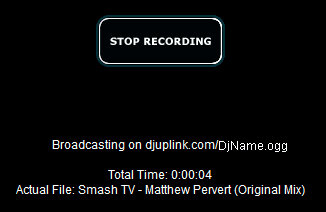
- Click on 'Start recording'.
- Virtual DJ is now broadcasting your audio.
(When your connection fails, check your broadcast setting and repeat the steps on this page.)
When Virtual DJ is connected, you need to finish the Beatbravo setup wizard:
- Go back to the Beatbravo 'Setup wizard'.
- In step 2, click on the 'Connection test' button.
- Beatbravo will now check the audio from Virtual DJ.
- Wait a while and see if the test is successful.
- When all went well, you are ready to broadcast!